Although there is a lot to learn about how to curl your hair, with enough practice and mastery you will be producing the best hairstyles.
How to Curl Your Hair Like a Pro at Home
Main contents
If you don’t know how to make curling simpler, you could struggle to reach back and curl your hair. There will always be a little learning curve no matter what hot styling product you use (straightener, blow dryer, curling iron, etc.). The range of curling equipment we have now only serves to accentuate that curvature. Although there is a lot to learn about how to curl your hair, with enough practice and mastery you will be producing beach waves and curly hairstyles like a superstar hairstylist.
Selecting Your Ideal Curling Tool
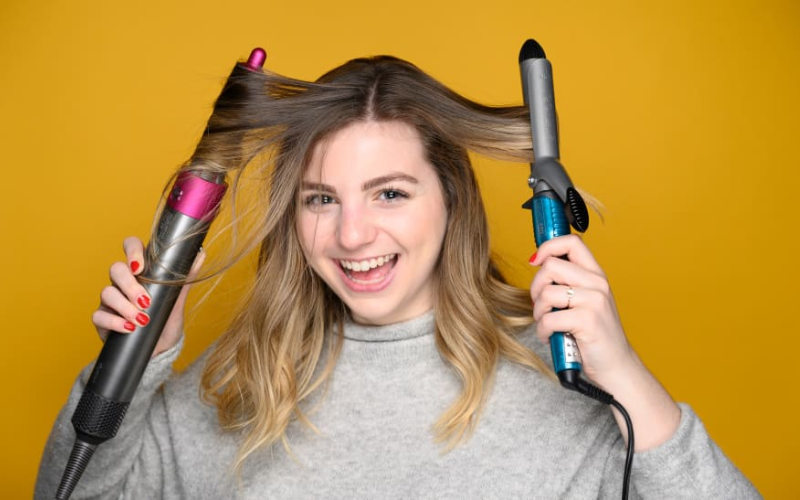
The first obstacle to overcome is deciding whether to use a curling wand or a curling iron. Both have benefits. Thompson claims that a curling iron has a clip that allows hair to be clipped in to finish curls through the ends. However, she continues, “This may seem old or archaic depending on how you curl.” The wand differs significantly. “Since a wand doesn’t have a clip, most people find it easier to operate.
As the wand warms up, the hairdresser instructs you to wrap your hair around the barrel while holding the end of the portion. It may also be the ideal tool for controlling beach waves. It results in ends that are straighter, which increases the beach curl or wave effect. I find that using a wand rather than an iron works better when showing visitors how to curl and wave their hair, especially for beachy waves, she claims.
Selecting Your Ideal Curling Tool
- 5-inch barrel: For people with naturally occurring curls and coils, a tiny diameter can assist define curls.
- 1-inch barrel: “I advise selecting an iron or wand with a one-inch barrel if you only plan on using one, Thompson advises. Then, for a looser curl or wave, use bigger portions of hair, and for a tighter curl, use fewer ones.
- 1.21-inch barrel: “Go for a 1.25-inch barrel for a loose beach wave appearance if your hair retains curls nicely.”
- 1.5-inch barrel: For people with long hair, the barrel can even be larger.
How to Get Perfect Curls: What You’ll Need
Here is all you need to know about how to curl your hair professionally:
- A ceramic curling iron or curling wand that contains tourmaline will be less likely to harm hair when heated up.
- These hair products are heat-protectant, protecting strands from harm from hot styling equipment. One of our faves is the thermal polymer-based OUAI Heat Protection Spray, which helps to produce wholesome, frizz-free curls.
- Use a soft hairbrush that can easily slide through both dry and damp hair.
- Clips for hair sectioning: Clips make putting up hair sections incredibly quick and flawless, especially in hard-to-reach areas.

Clips for hair sectioning
- Hairspray: You can maintain your hairstyle while retaining its natural movement, soft texture, and gloss by using a flexible hold hairspray.
2 Different How to Curl Your Hair Methods
Curl Method 1: Simple Daily Curls
You may master more complex strategies by building on this fundamental approach, which is excellent for beginners.
Step 1: Dry and untangle. Make sure your hair is totally dry before curling it since damp hair can break. Next, untangle your hair using a brush.
Step 2: Get your tools ready. Pick out your curling iron and heat it up. To prevent burning and damage from excessive heat, Saviano advises using a lower setting, such as 400 for thin hair and 425 for thicker, coarser hair.
Step 3: Section and safeguard. Use your fingers to separate an inch-diameter segment of hair from the rest of your hair, starting at the bottom, and spray it with heat protectant.
Step 4: Start curling. Wrap the whole hair strand around the barrel of the iron while holding it upright with the tip facing downward. Hold for a short while, then let go and wait for it to cool before touching. Repeat this procedure for the remainder of your hair before moving on to the following stage.
Step 5: Set and brush out. For a more natural appearance, softly comb or brush the curls after you’ve curled your entire head of hair.
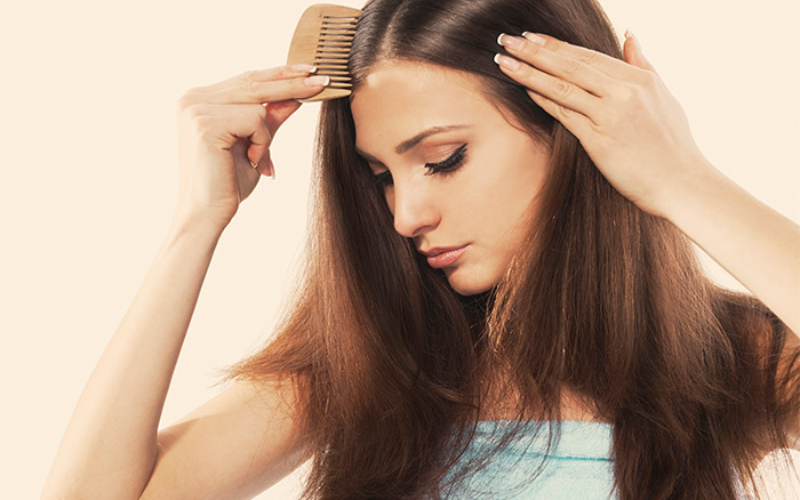
Softly comb or brush the curls
Curl Method 2: Twist-and-Turn Technique for Tight Curls
Step 1: Prepare your hair by sectioning it. Apply heat protectant to your hair and segment it using the same procedures as in Curl Method 1.
Step 2: Brush your hair and twist it. Spritz a one-inch section of hair with hairspray (or, spritz on after you curl if you have damaged hair). The segment should then be forcefully twisted from root to tip. Wrap the twisted hair segment around the barrel of the curling wand in the same direction as it was twisted (either towards or away from the face). Hold the curl for around 10-15 seconds longer to get that wonderful S-shaped spiral. Then, pin to cool and set.
Step 3: Keep going around and around in your head. Repeat steps 2 for each piece of hair you want to curl, while winding the twisted strand of hair around the curling iron consistently.
Step 4: Set a style for it. Start unpinning each section of hair when it has completely cooled. Then, turn your head over and shake it out to generate volume and somewhat loosen the spirals. To make your curls linger for days, lightly spritz a little bit more hairspray on the hair.
>> Read more: Top 7 Hair Expert’s Choices for Best Hair Moisturizer For Black Hair
Conclusion
For those of you having problems learning how to curl your hair at home like a professional beautician, this is a thorough guide. If you adhere to our recommendations, the installation will be less complicated. I hope you can design the hairdo you want.
Contact us:
+ Whatsapp: +84387751243
+ Email: leeanh@cyhair.vn
+ Factory address: Bac Ninh City, an hour’s drive from Hanoi Capital
+ Office: Sabay Tower, 11 Hong Ha Street, Ward 2, Tan Binh District, Ho Chi Minh City, Vietnam.
Pingback: How To Bleach The Knots On Your Closure With 5 Steps | CYHAIR
Pretty! This has been an incredibly wonderful post. Many
thanks for supplying this information.
Here is my web page – https://dgfhyeidjmdk4.com/
price of generic viagra in canada does viagra stop premature ejaculation cialis viagra buying generic viagra online safe viagra online bestellen per nachnahme
Международные денежные переводы – Открытие валютных счетов в иностранных банках, Покупка и продажа криптовалют
купить левые аккаунты в инстаграм – vk автореги, vk бизнес аккаунт
what are side effects of cialis cialis coupon rite aid order cialis no prescription cialis recreational cheap cialis 60 mg
interesting post
_________________
https://bdbetting.site
Youngest pussy in one place – real content inside the box, youth at the bottom of the box
Top Places to Visit in Portugal – Best Restaurants in Malaysia, The Best Attractions in Estonia